


 Facebook
 Pinterest
 Email
Email
 Print
Print
- Recipe Index

- Breads
- Yeasted Breads
- Homemade Cinnamon Rolls (Soft + Fluffy!)
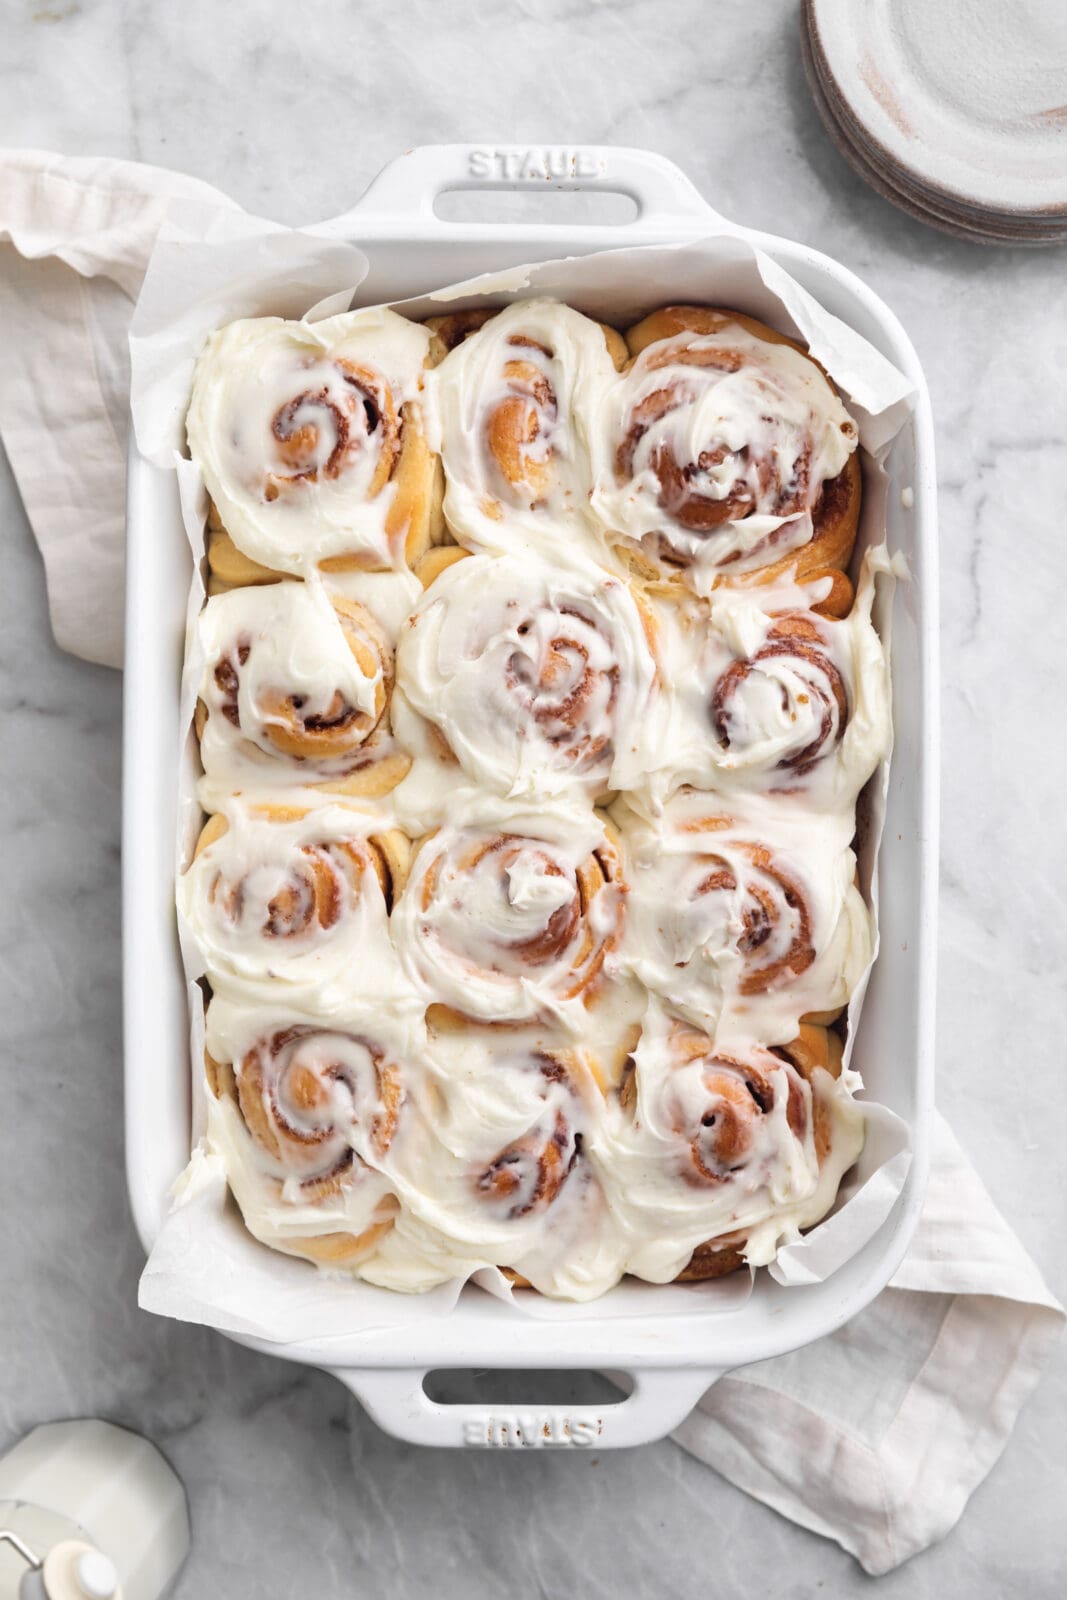
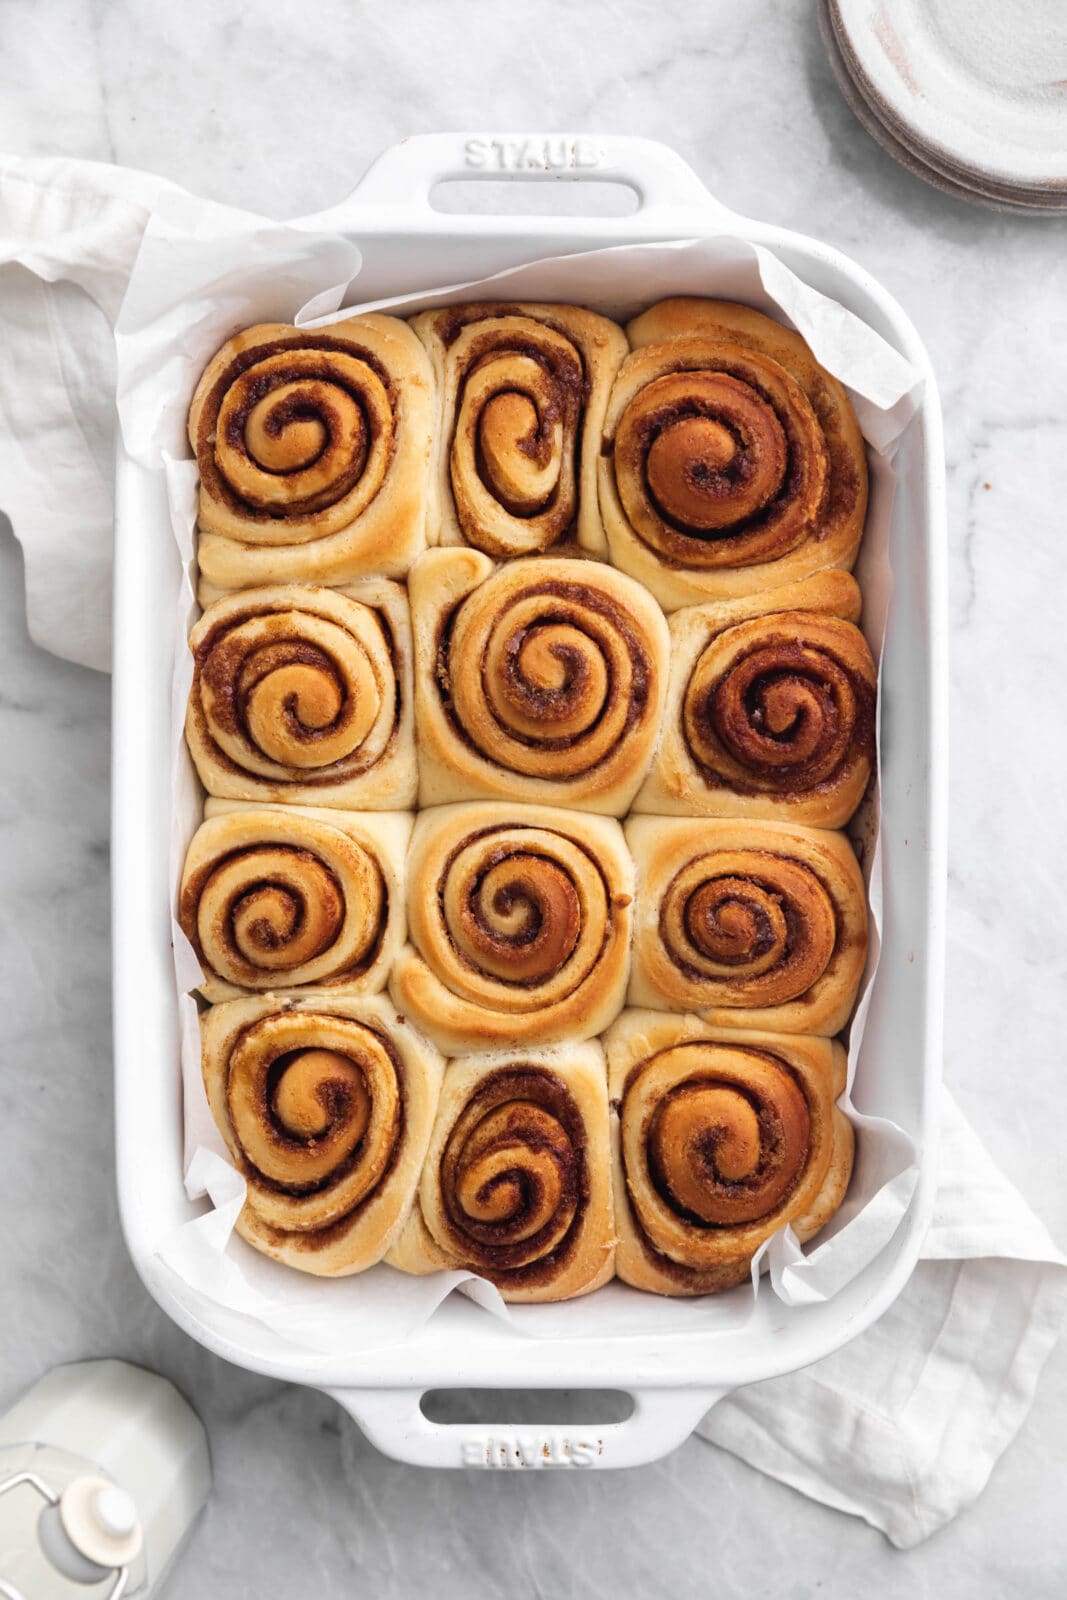
Homemade Cinnamon Rolls (Soft + Fluffy!)
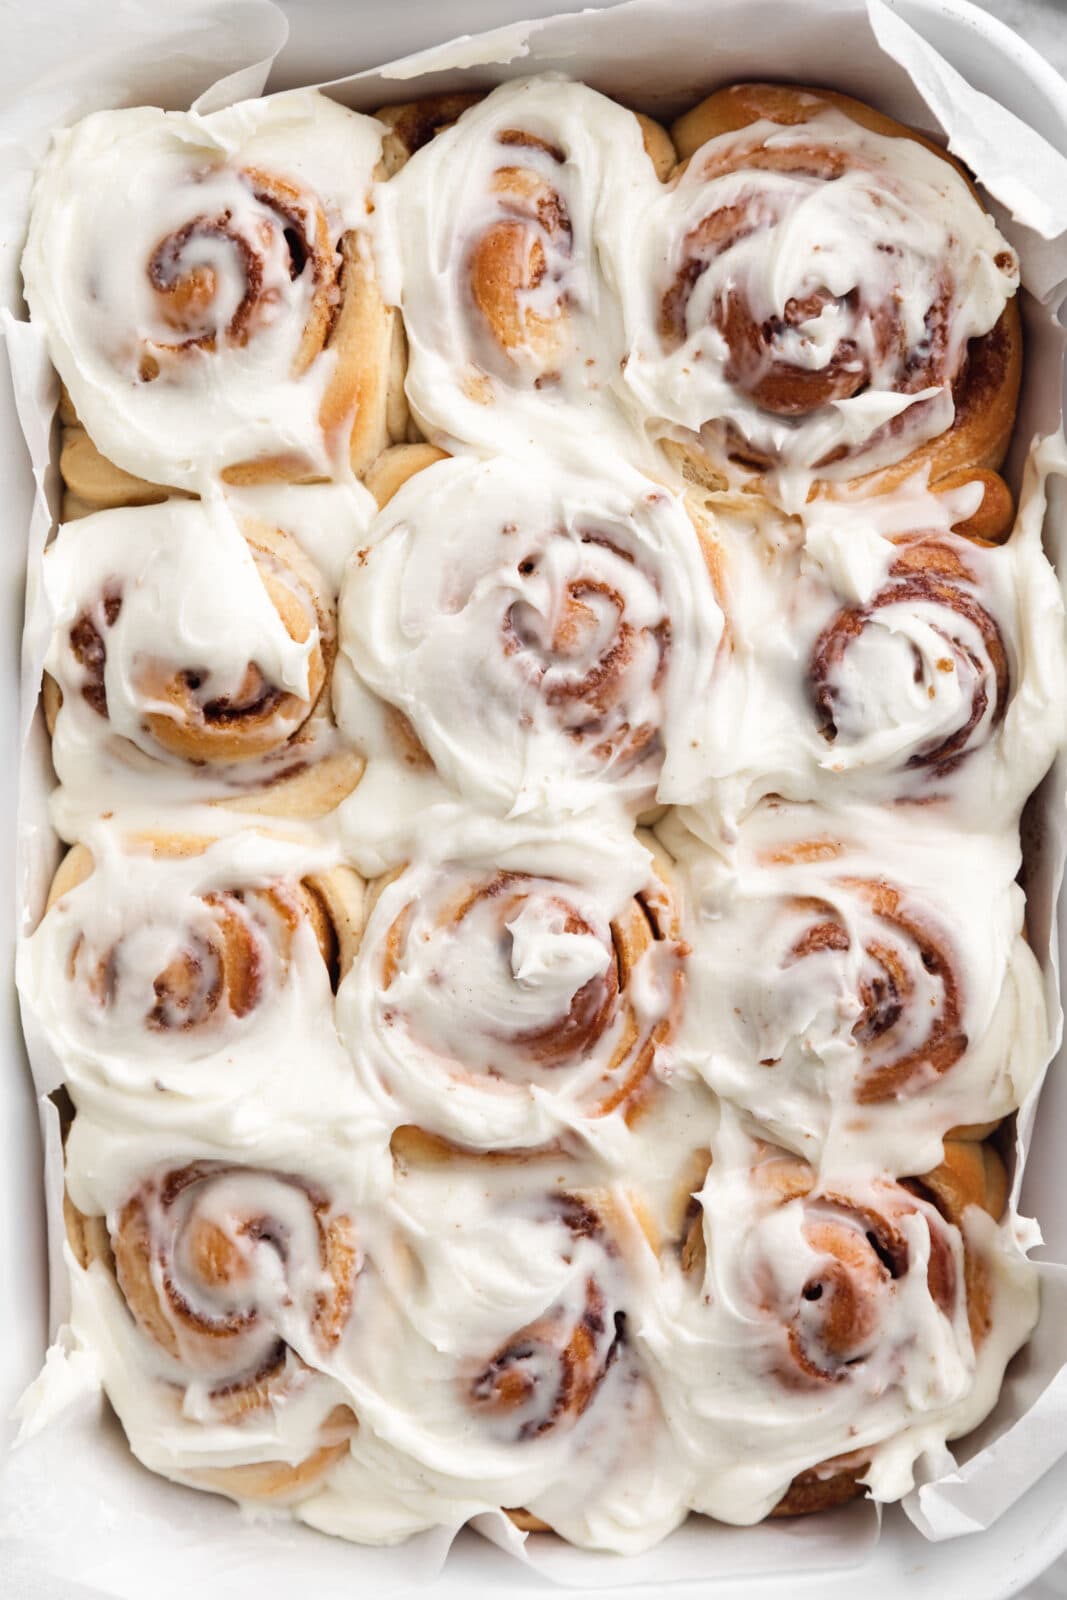
There is nothing better than pillowy soft, gooey-in-the-middle, smothered in cream cheese frosting, homemade cinnamon roll. These perfect cinnamon rolls taste even BETTER than Cinnabon.
Homemade Cinnamon Rolls
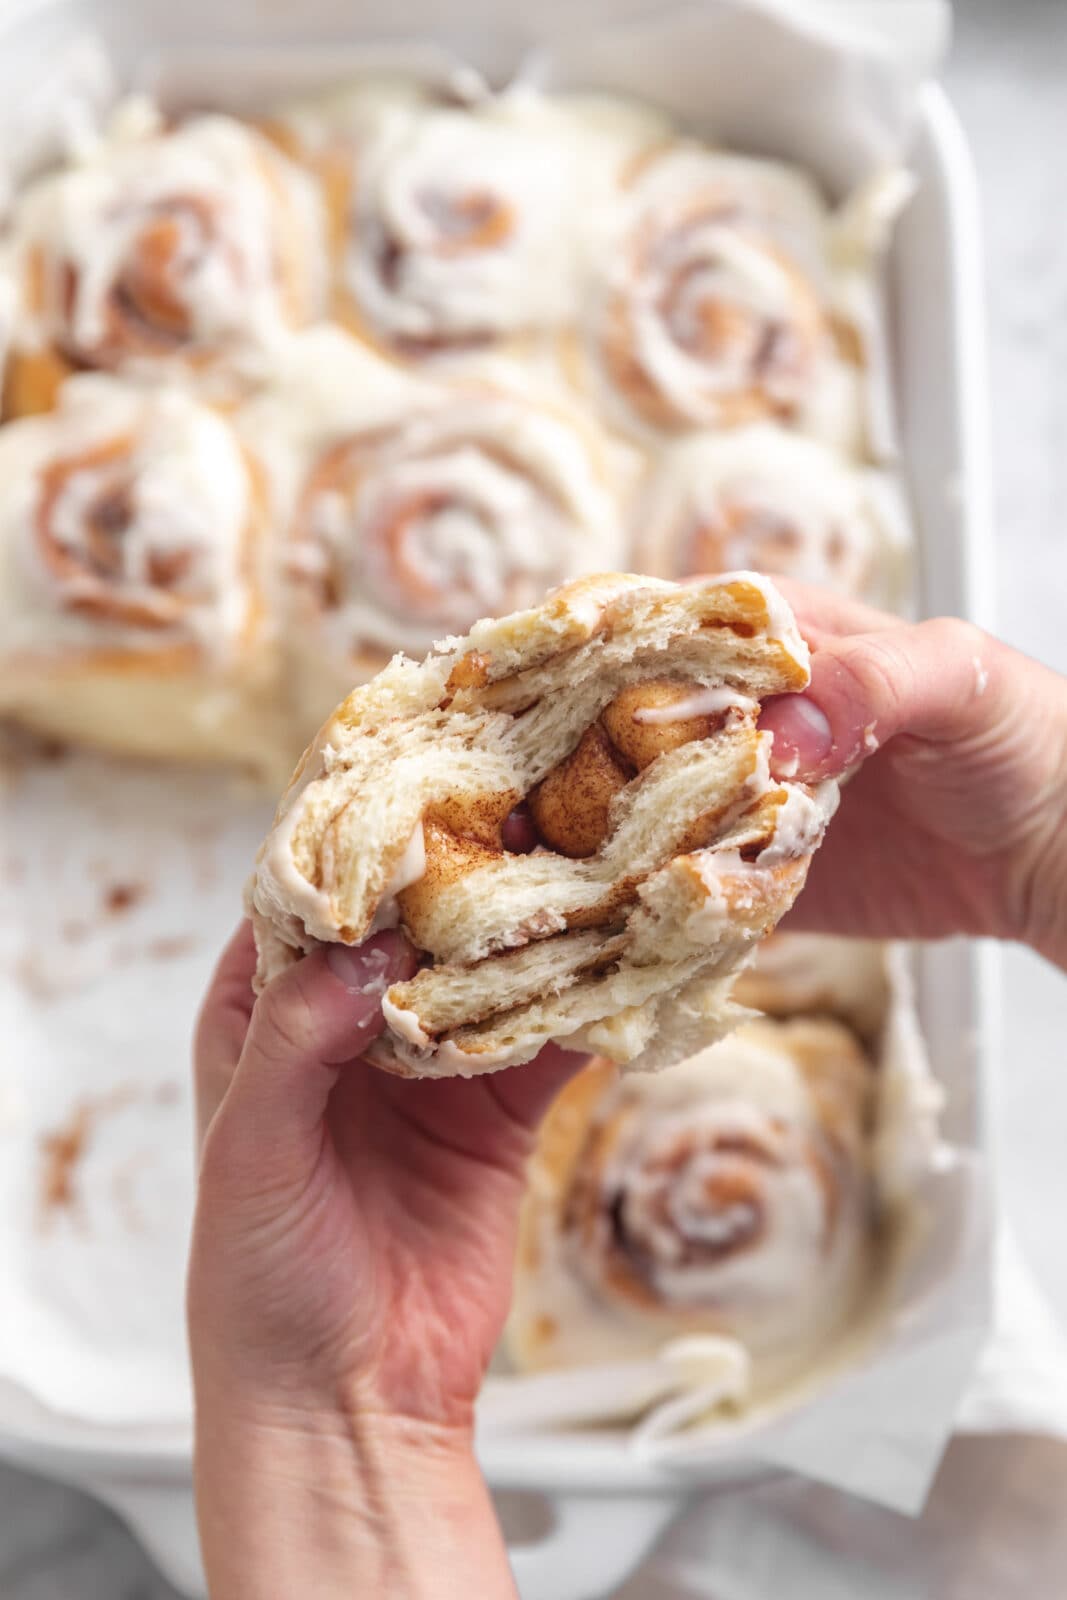
I think we can all agree that there are few greater pleasures in this world than a warm, homemade cinnamon roll. Like, I’m salivating just thinking about that gooey, underbaked center. And while you can, of course, get a Cinnabon at the mall or grab a can of Pillsbury Grands, nothing really beats a homemade cinny roll. This recipe took me years to perfect. The cinnamon roll dough is soft, fluffy and lightly sweet; the cinnamon sugar filling is perfectly spiced and buttery; the cream cheese frosting is perfectly tangy and sweet can only be described as luscious. Put those three components together and you have yourself a knock-your-socks-off good cinnamon roll.
Ingredients for homemade cinnamon rolls
Cinnamon rolls are one of those magical confections that taste like they have a million ingredients in them but actually call for basic pantry staples you probably already have on hand. Here’s your grocery list for these homemade cinnamon rolls:
- All Purpose Flour: All purpose flour is perfect for creating a pillowy soft, tender, slightly bready dough. I’ve also had success making these with bread flour, but I find bread flour makes them a bit chewier!
- Granulated Sugar: You’ll need a little granulated sugar to active the yeast and also to sweeten your dough slightly!
- Instant Yeast: We usually use Fleischmann’s Rapid Rise for these homemade cinnamon rolls, but any rapid instant yeast will work here! You can also use regular active yeast and double the rise times!
- Butter: You’ll need butter for both the cinnamon roll dough and the cream cheese frosting. We prefer using unsalted butter so you can control how much salty is going into your baked goods! That being said, if all you have on hand is salted butter that will work totally fine too! In the dough you’ll use melted butter and in the cinnamon sugar filling you’ll need room temperature butter, so be sure to leave some butter out on the counter for an hour or so to get it nice and soft!
- Milk: Any kind of milk will work in this recipe, but for a super soft, buttery dough we recommend using whole milk!
- Eggs: These homemade cinnamon rolls are an enriched dough, meaning the recipe calls for eggs. The eggs will give your dough a soft structure!
- Cinnamon: UH DUH. You’ll need cinnamon for the cinnamon sugar filling! Sometimes when I’m feeling spicy, I put 1 teaspoon in the dough too!
- Brown Sugar: Brown sugar is the perfect, caramel-y, soft sugar to use for your cinnamon sugar filling. You can feel free to use light brown sugar or dark brown sugar, but you we do not recommend subbing it out for granulated sugar–it won’t melt in the same way!
- Pure Vanilla Extract: The amount of vanilla extract in this recipe may be small, but she is mighty! A few teaspoons will take your rolls from good to great!
- Cream Cheese: In my opinion it’s not a cinnamon roll if its not absolutely smothered in cream cheese frosting. It’s imperative that you use room temperature cream cheese to get that nice creamy, smooth consistency.
- Powdered Sugar: You’ll need powdered sugar to sweeten and thicken your cream cheese frosting.
How to make the best cinnamon rolls
Cinnamon rolls are a more involved process than your standard chocolate chip cookie or muffin recipe…I get it. It can seem a little daunting. But luckily we’ve broken everything down for you so you’ll be a homemade cinnamon roll baking pro in no time!
Cinnamon rolls require making three components (dough, cinnamon sugar, and cream cheese frosting) and this homemade cinnamon roll recipe needs 2 rises so you’ll have to be a little patient too. But isn’t that the fun in baked goods sometimes? These are a special treat and all that extra work and love makes them even more delicious.
 .
. 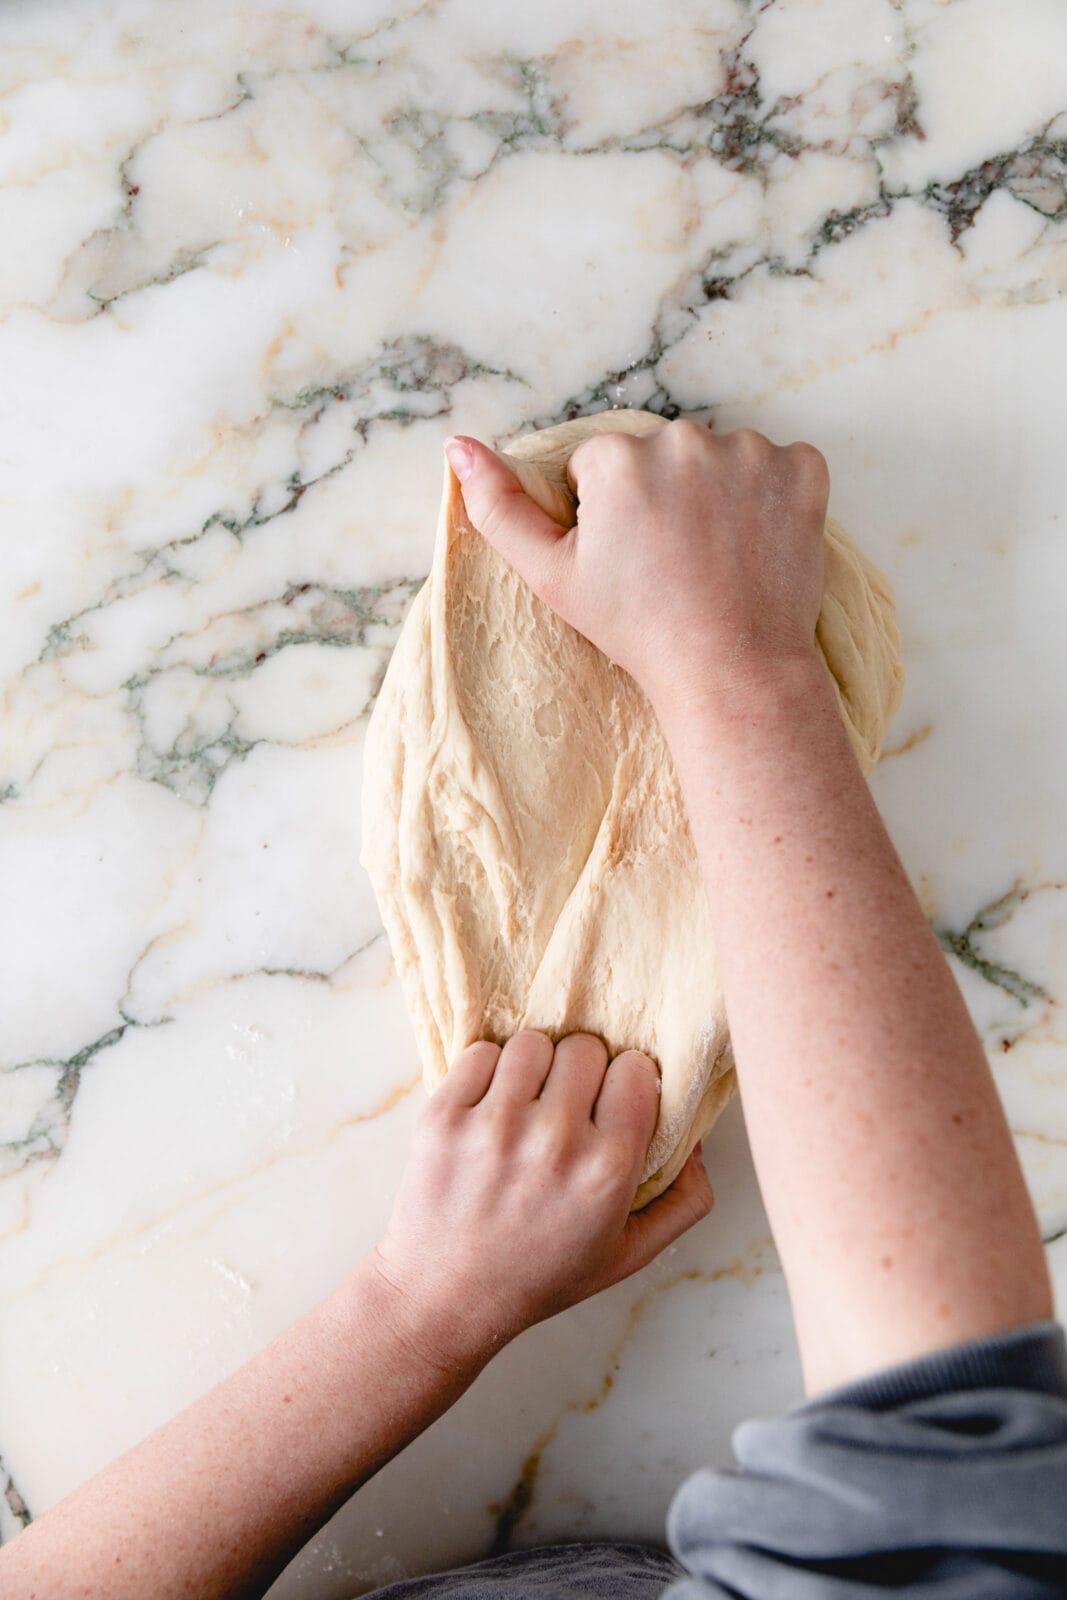
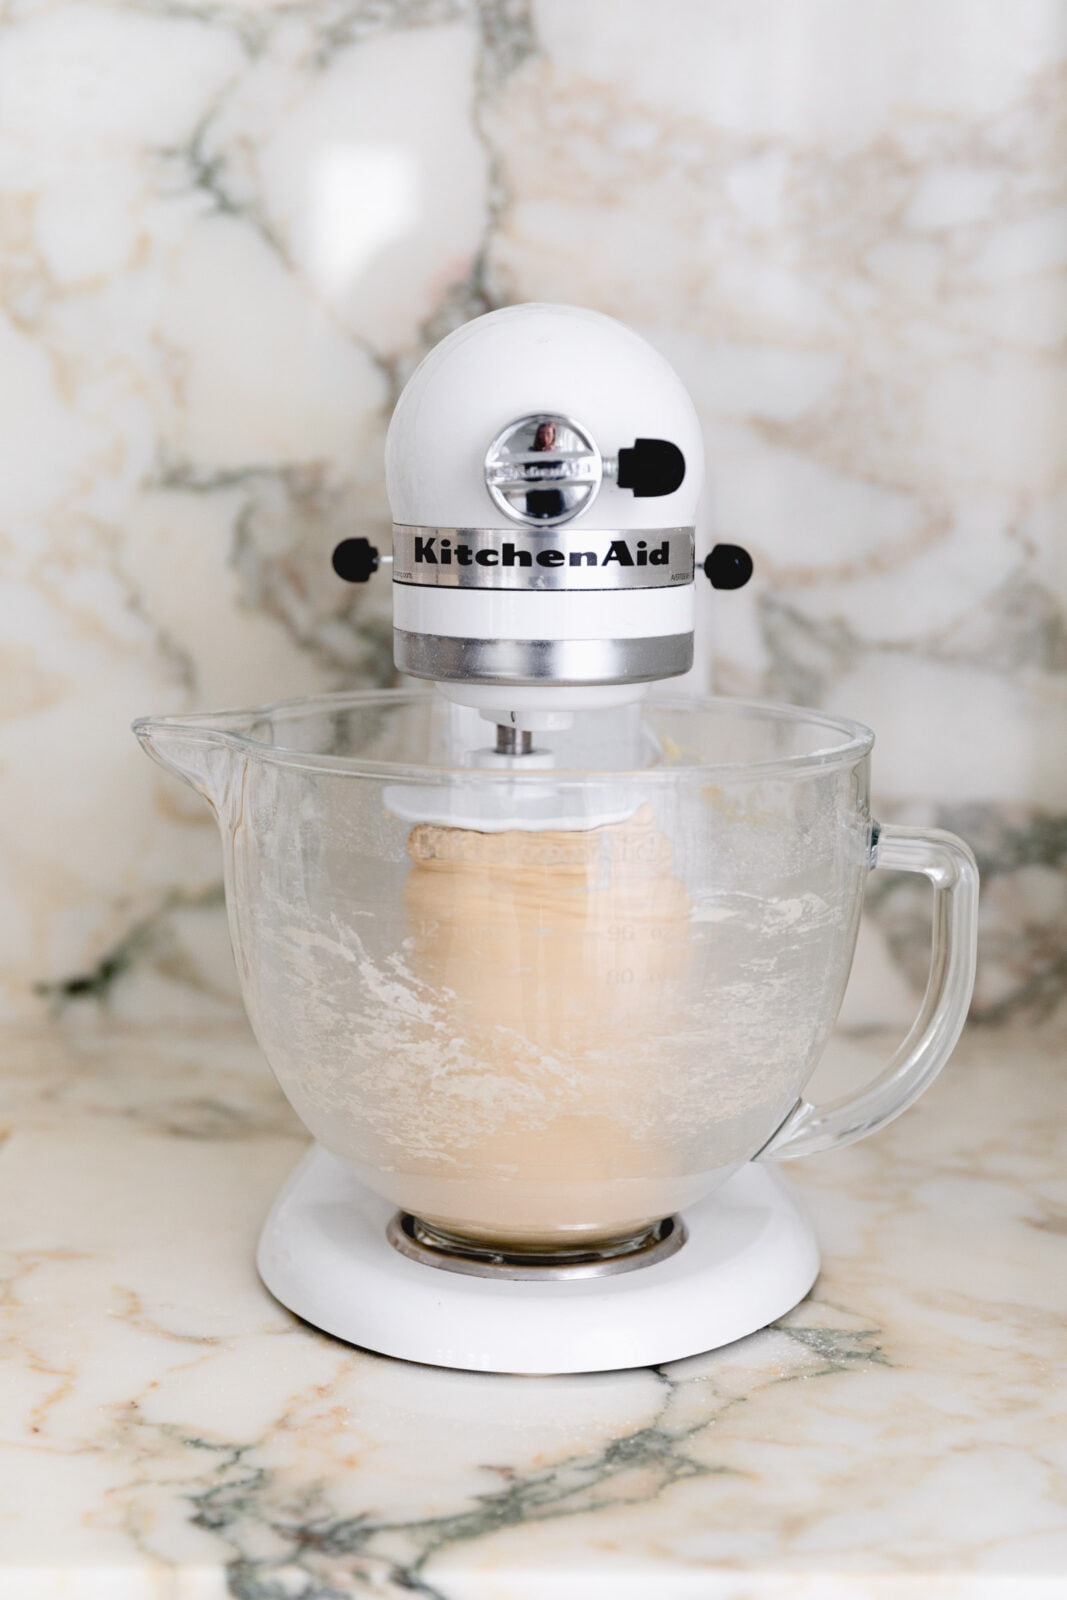
- Make the cinnamon roll dough and knead for 10 minutes in a stand mixer or by hand until it passes the window pane test.
- Let the dough rise for 1 hour.
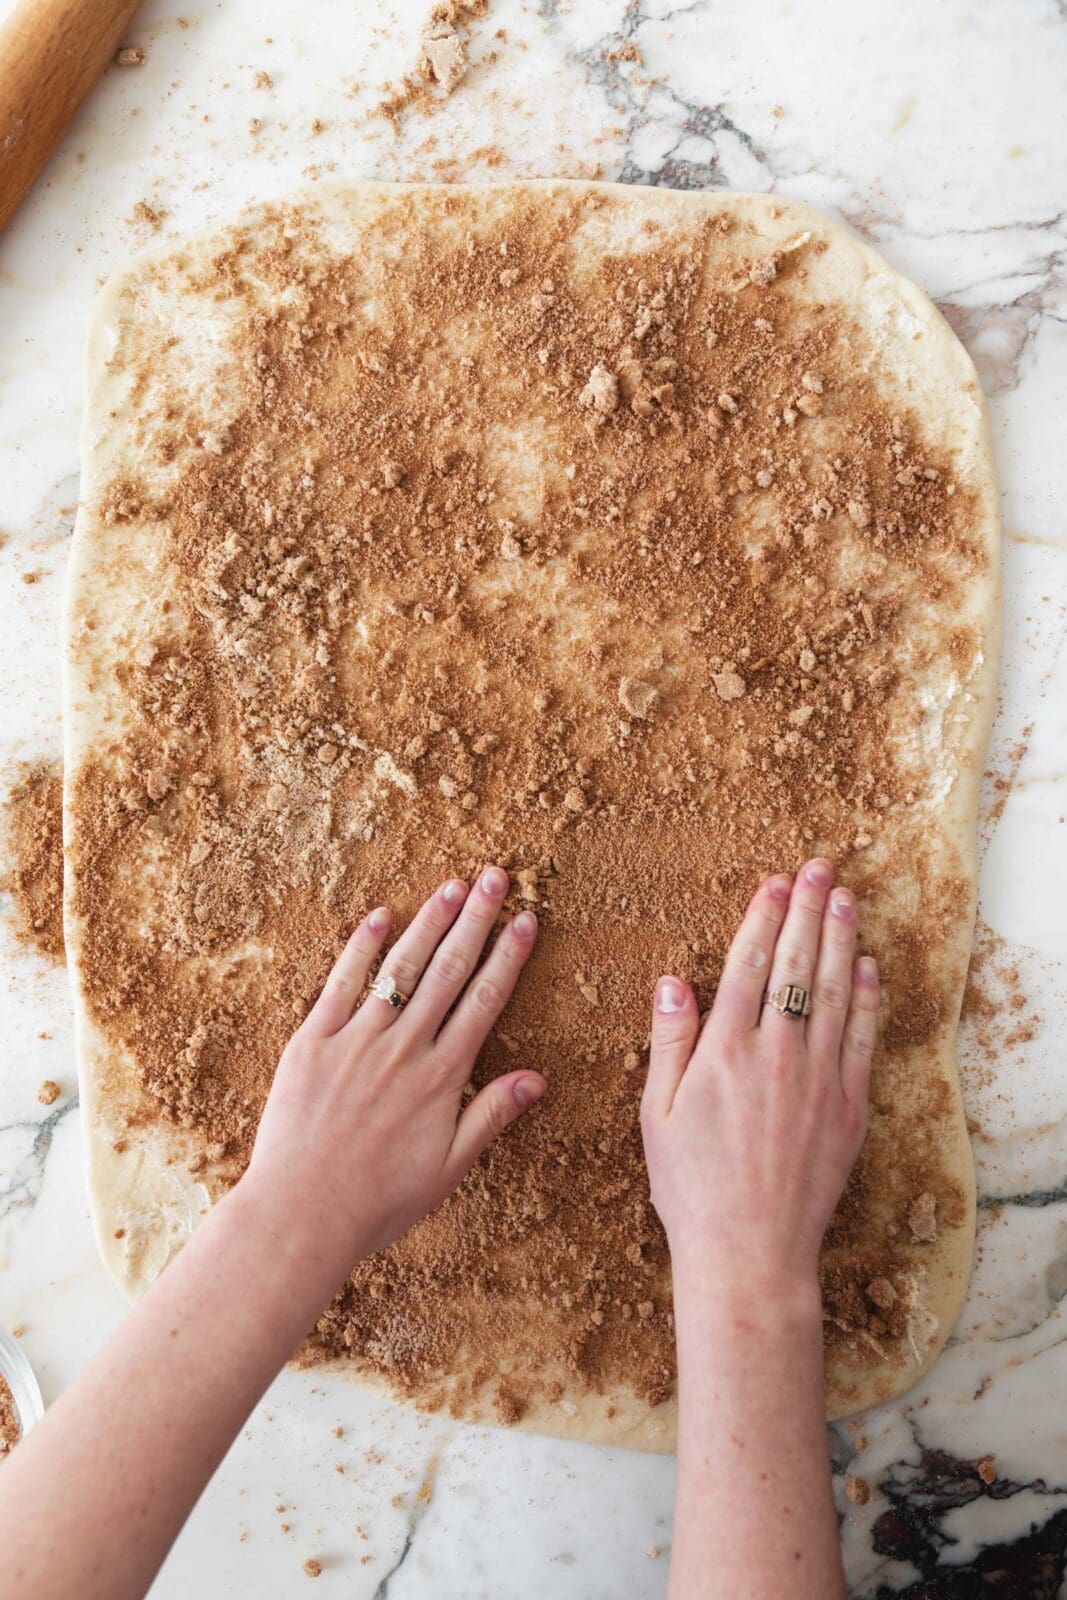
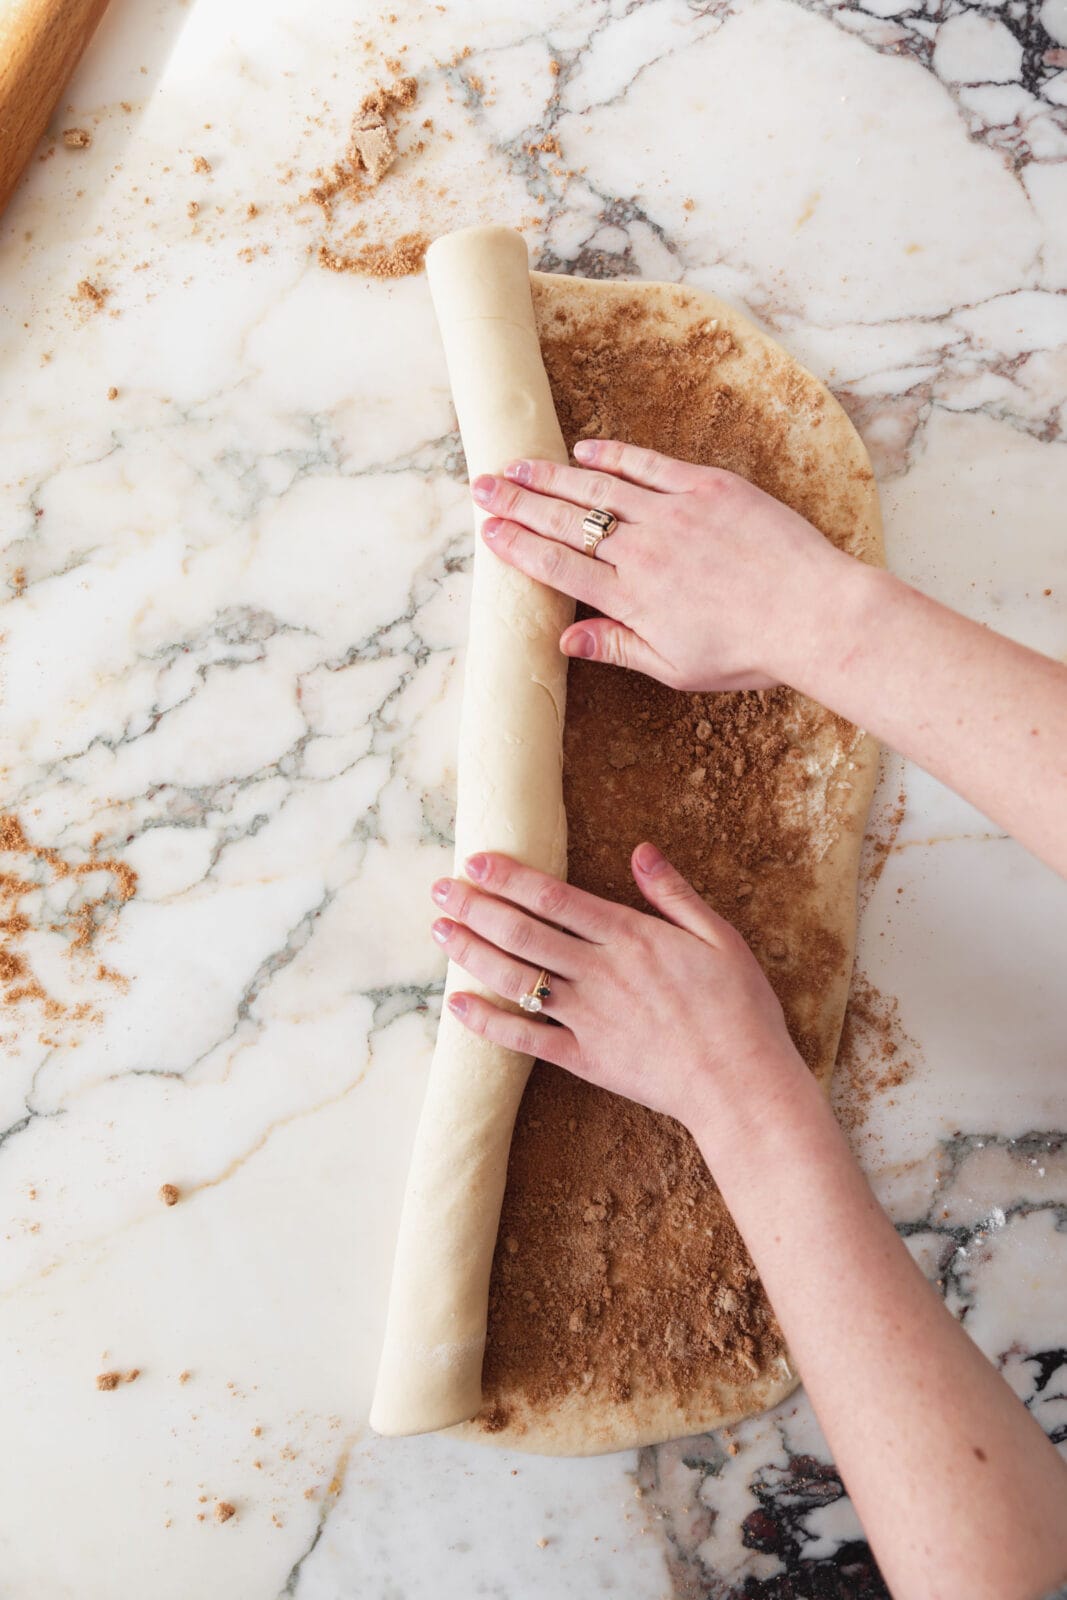
- Roll out the dough into a large rectangle, spread with the filling, and roll up!
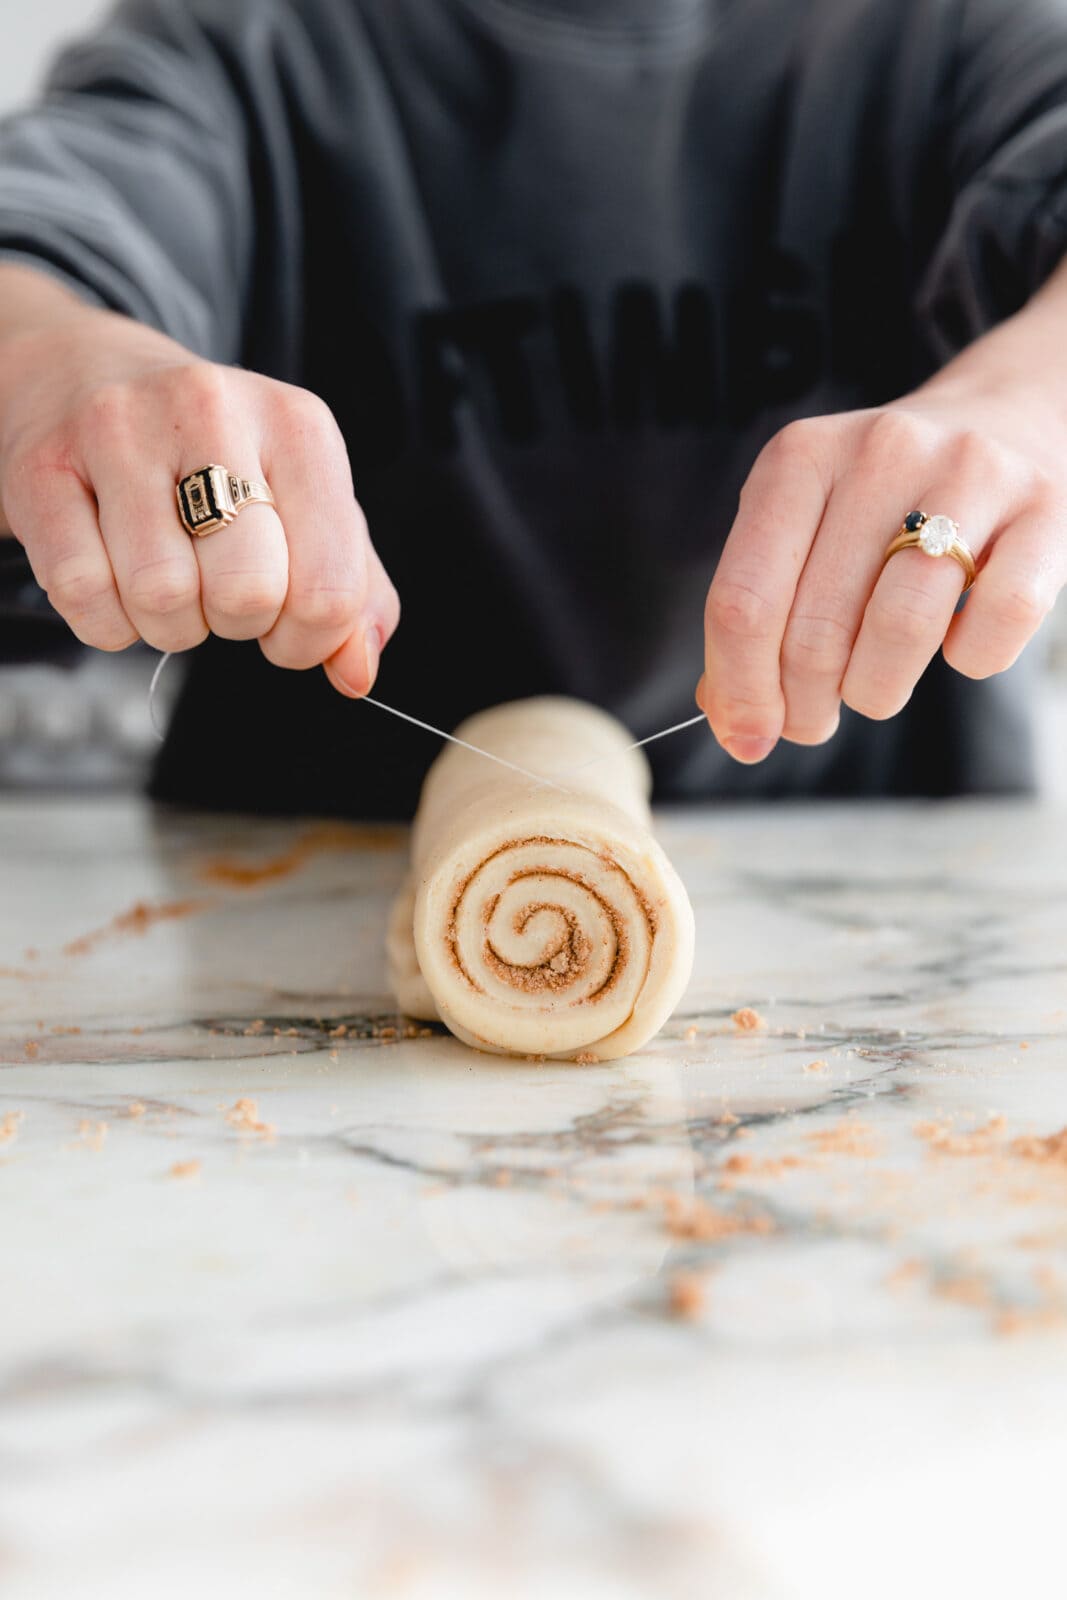
- Slice the cinnamon rolls using a very sharp knife or unflavored dental floss into 12 equal pieces and place into a baking pan (I love a 9 x 13).
- Let the rolls rise for another hour.
- Bake for 30 minutes or until golden brown.
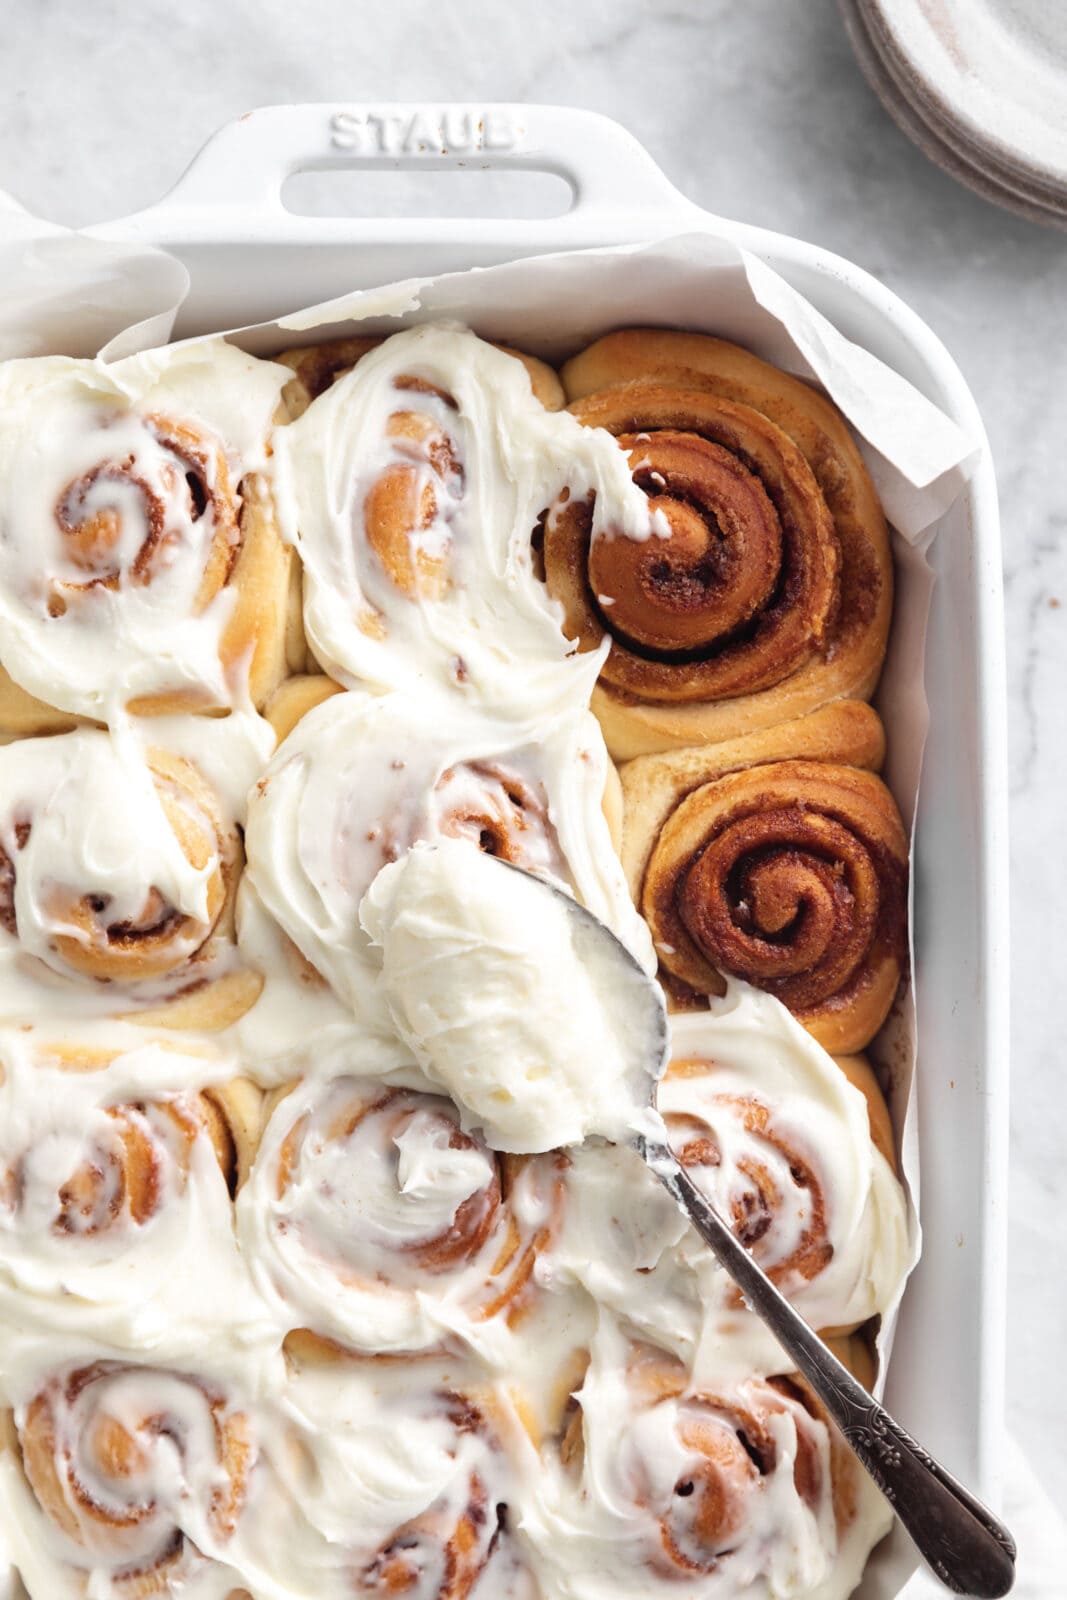
- Finally, Top with cream cheese icing. Lick the spoon (obviously), and dive into your gooey homemade cinnamon rolls!
 .
. 
How to know when to stop kneading your cinnamon roll dough
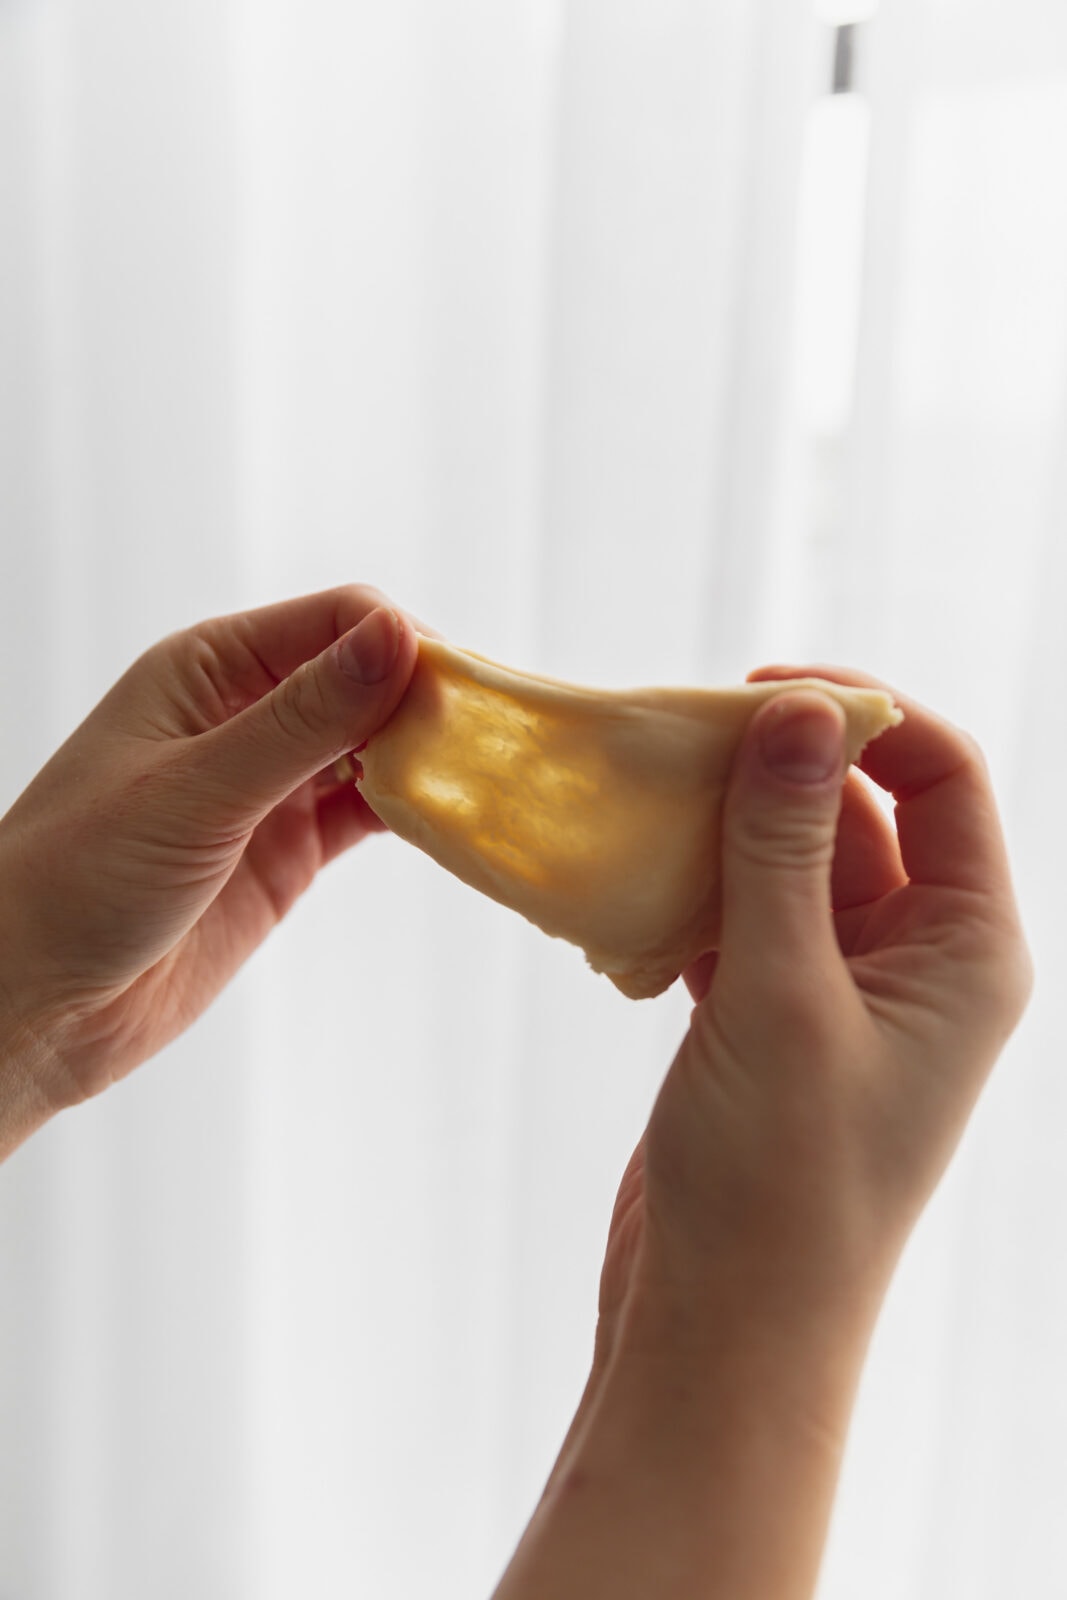
If you watch any baking shows (looking at you, The Great British Bake Off), you’ve maybe heard of “the windowpane test.” This is the easiest and simplest way to test if your dough has developed enough gluten (bonds in the dough that will give it that nice dough-y, cinnamon roll texture).
Rip off a small piece of dough and place it between your fingers, gently spreading your fingers apart to stretch out the dough. If the dough can stretch out and get translucent (I like to hold it up to a window and see that light passes through it), you’ve kneaded it long enough and you can shape it and place it in a bowl to rise. If the dough rips and will not stretch out you’ll need to knead your dough more. Place the piece of dough back with the rest of it and knead the dough for a few more minutes (1 or 2 should do it!) and repeat the test until your dough passes with flying colors!
Tips for baking with yeast for beginners
Now I know that cinnamon rolls can feel a little intimidating. Homemade dough, multiple rises, proofing…I get it. But believe me when I tell you that it is so so SO worth it for a gooey homemade cinnamon roll hot from the oven. Plus, once you get the hang of baking with yeast, it’s not so hard! Plus you’ll get the dreamiest, soft, slightly bready dough that tastes worthy of a bakery in no time. Who knew homemade could be so easy?
- Make sure your yeast is fresh: There is NOTHING worse than going through all the kneading and steps of cinnamon roll baking and then coming back to your dough after its first rise and finding it flat. It’s happened to me before and it’s truly soul crushing. You don’t have to activate instant yeast, but
- Let the dough have its full rise time: Yeasted dough requires some extra time and planning but it’s so worth it for homemade cinnamon rolls. Make sure you give the dough the full rise time for the ultimate soft and fluffy dough. If you try to rush the process you can end up with sad, dense rolls.
Tips for the perfect homemade cinnamon rolls
If you’re new to yeasted dough, follow the recipe closely, trust the process, and keep at it!
- Use high quality ingredients: You saw the shopping list–cinnamon rolls use just a few, basic ingredients, so their quality will really shine through in the finished product. Use good butter, real cream cheese and high quality cinnamon!
- Don’t over bake them: I think we can all agree that the best part of a cinnamon roll is the gooey, slightly under baked center. It’s a fine line between over baked and too doughy, so keep an eye on them in the last 10 minutes of baking and remember that they will continue to bake as they cool!
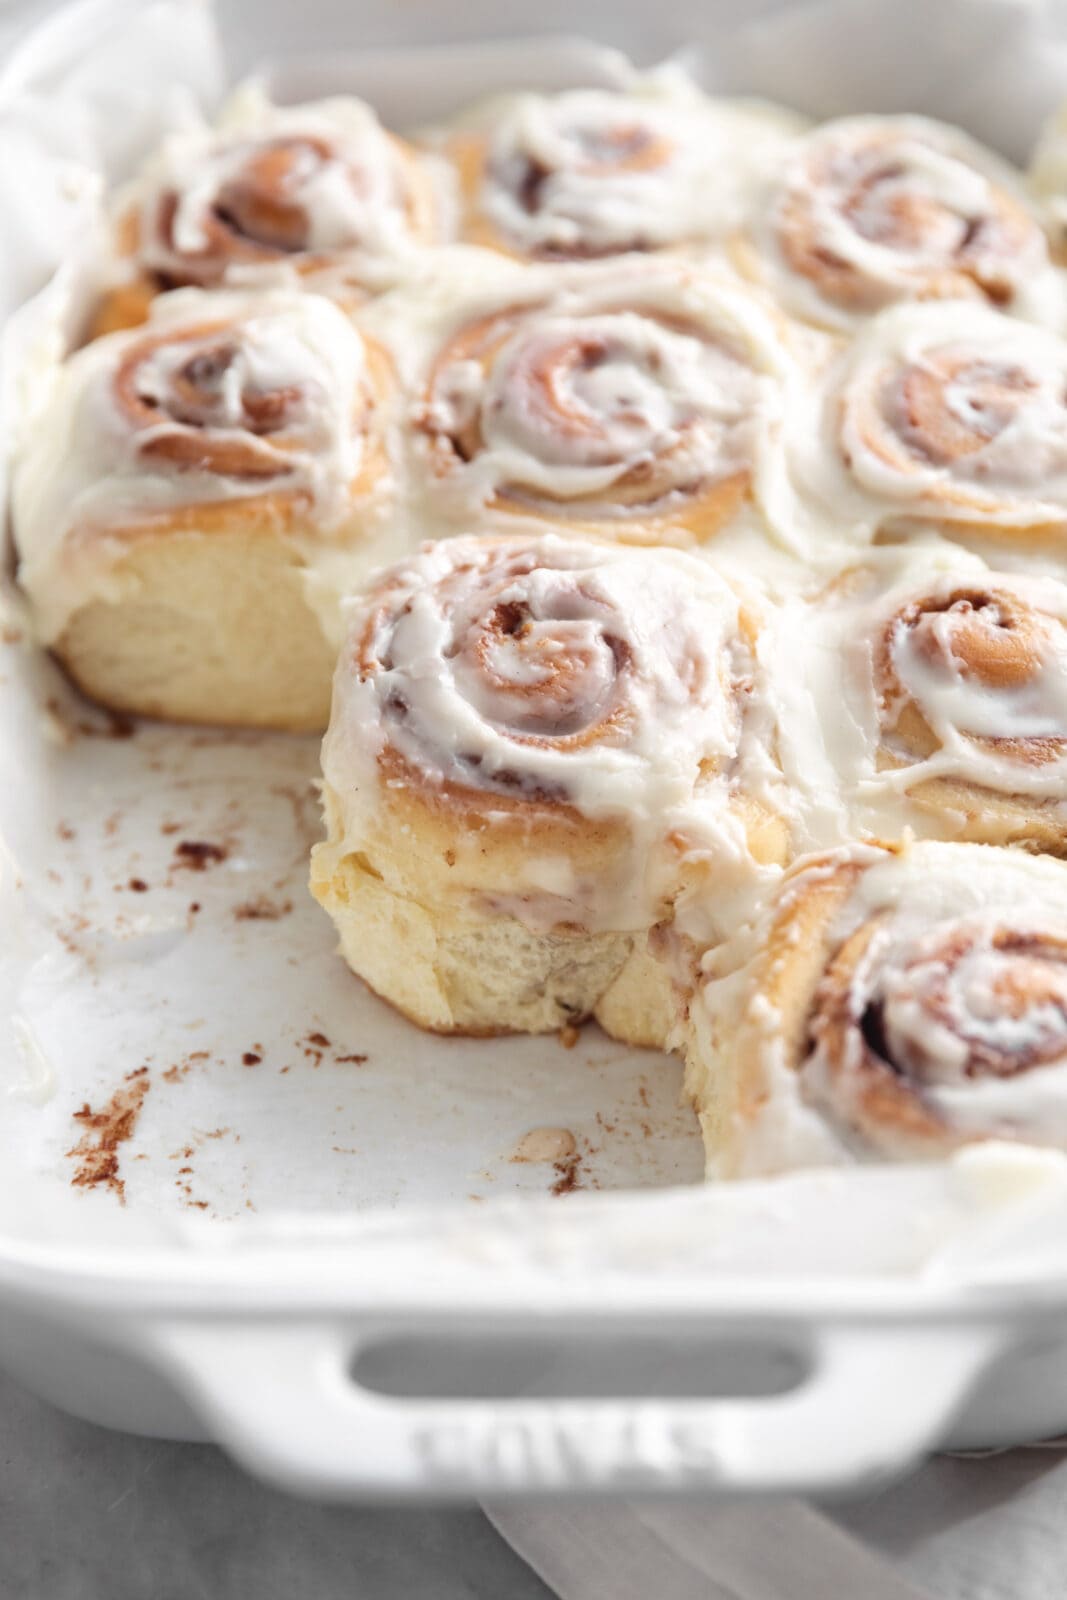
- Eat them warm: Cinnamon rolls are best hot from the oven (duh.), but don’t worry if you have leftovers that you want to enjoy later. Simply pop your cinnamon roll in the microwave for 20 seconds to get it gooey and warm again!
How to store these cinnamon rolls so they stay pillowy soft and fluffy
In the unlikely scenario that these cinnamon rolls aren’t inhaled on the spot, you can absolutely store these for later! Here are our top tips for storing these homemade cinnamon rolls so they stay pillowy soft for days!
- Underbake the rolls slightly: This is the cardinal rule of cinnamon roll baking. The best part about homemade cinnamon rolls is that slightly underbaked doughy center. This will also help the rolls stay moist and soft if you’re storing them!
- Only frost the cinnamon rolls you’re planning on eating: Frosting can get a little weird when it goes through a bunch of temperature changes. I find these cinnamon rolls keep best unfrosted so they don’t get soggy. Simply keep the frosting in a container in the fridge and frost your cinnamon roll when you’re ready to eat it!
- Store in an airtight container or tightly wrapped: This will help seal out any air and keep your homemade cinnamon rolls soft!
- Heat up before eating: Cinnamon rolls are always best ooey gooey and warm. Simply pop your cinnamon roll in the microwave for 30 seconds or in a 350°F oven for 10 minutes to heat it back up to that fresh baked warmth!
Can you make these cinnamon rolls the night before?
If you’re looking to have fresh cinnamon rolls in the morning, but don’t want to wake up at the crack of dawn, don’t worry. You can make these rolls the night before and let them proof in the fridge overnight. Simply follow the recipe through Step 11, but instead of letting the rolls rise at room temperature for their second rise, cover them and pop them in the fridge to proof. In the morning take the rolls out of the oven and let them sit on the counter to warm up for 30 minutes before baking as directed! Enjoy!
Happy cinnamon roll baking! And more importantly, happy cinnamon roll eating 🙂
XXX
Follow my step by step video here!
PrintHomemade Cinnamon Rolls (Soft + Fluffy!)

- Prep Time 30 minutes
- Cook Time 30 minutes
- Total Time 1hr
- Yield 12 rolls
- Category breakfast
- Method oven
- Cuisine american
Homemade Cinnamon Rolls (Soft + Fluffy!)
There is nothing better than pillowy soft, gooey-in-the-middle, smothered in cream cheese frosting, homemade cinnamon roll. These perfect cinnamon rolls taste even BETTER than a Cinnabon.
- Prep Time 30 minutes
- Cook Time 30 minutes
- Total Time 1hr
- Yield 12 rolls
- Category breakfast
- Method oven
- Cuisine american

Ingredients
For the dough
- 4 1/2 cups all-purpose flour
- 1/3 cup granulated sugar
- 1 packet (2 1/4 tsp.) Rapid Rise Instant Yeast
- 1 teaspoon salt
- 1 1/2 cups milk
- 6 tablespoons unsalted butter
- 1 egg, at room temperature
For the cinnamon sugar filling
- 2/3 cup light brown sugar
- 1 tablespoon ground cinnamon
- Pinch of salt
- 1/4 cup butter, room temperature
For the cream cheese frosting
- 4 ounces cream cheese, at room temperature
- 1/2 cup unsalted butter, at room temperature
- 3 cups powdered sugar
- 2 – 3 tablespoons milk
- 1 teaspoon vanilla extract
- Pinch of salt
Instructions
- First, make the dough. In a stand mixer fitted with the whisk attachment, mix 2 cups of the flour with the granulated sugar, yeast, and salt on low speed until combined.
- In a microwave-safe bowl, microwave the milk and butter until the mixture is warm to the touch and the butter is mostly melted, about 45 seconds (you don’t want the mixture to be steaming or too hot, as this can kill the yeast).
- Pour the milk mixture into the flour mixture. Add in the egg. Beat everything together on low speed until combined. Gradually increase the speed to high and beat for 2 minutes. The dough will look more like batter, but this is correct! This step kicks off the gluten development.
- After 2 minutes, change to the dough hook attachment. Add in an additional 1 ½ cups of flour and knead on low speed until combined. Use a silicone spatula to scrape down the sides of the bowl. Add the remaining 1 cup of flour (totaling 4 ½ cups) and knead on low speed, stopping the mixer occasionally to re-disperse dough, until the dough starts to pull away from the sides of the bowl and forms a ball around the dough hook.
- Increase to medium-low speed and knead until the dough becomes smooth and supple, about 10 minutes. If the dough gets wrapped around the hook too much, turn off the mixer, pull the dough off, flip it over, and turn on the mixer again. The dough is ready when you can stretch a quarter-sized piece of dough between your fingers and see light through it (without it breaking). This means the gluten has developed enough! If your dough breaks, knead for a few minutes more and try again.
- Transfer the dough to a large lightly-oiled bowl and cover the bowl with a dish towel or plastic wrap. Let rise in a warm place until the dough has doubled in size, about 1 hour.
- Once the dough has risen, make the filling. In a small bowl, combine the brown sugar, cinnamon and salt. Stir to combine.
- Turn the dough onto a well-floured surface. Use a rolling pin to roll it into a 12-inch long by 18-inch-wide rectangle, with the wider side closest to you.
- Using your hands or a silicone spatula, spread the butter all the way to the edges of the dough. Sprinkle the brown sugar mixture on top, then use your fingers to spread it into the butter.
- From the 18-inch wide side closest to you, roll the dough into a tight log. Press the dough along the outside seam to seal everything together. Use a very sharp knife (or floss…yes seriously!) to cut the dough into 12 even rolls. Place the rolls in a 9 x 13-inch inch pan lined with parchment paper on all sides. Cover the pan with a dish towel or plastic wrap and allow to rise in a warm place until doubled in size, about 1 hour.
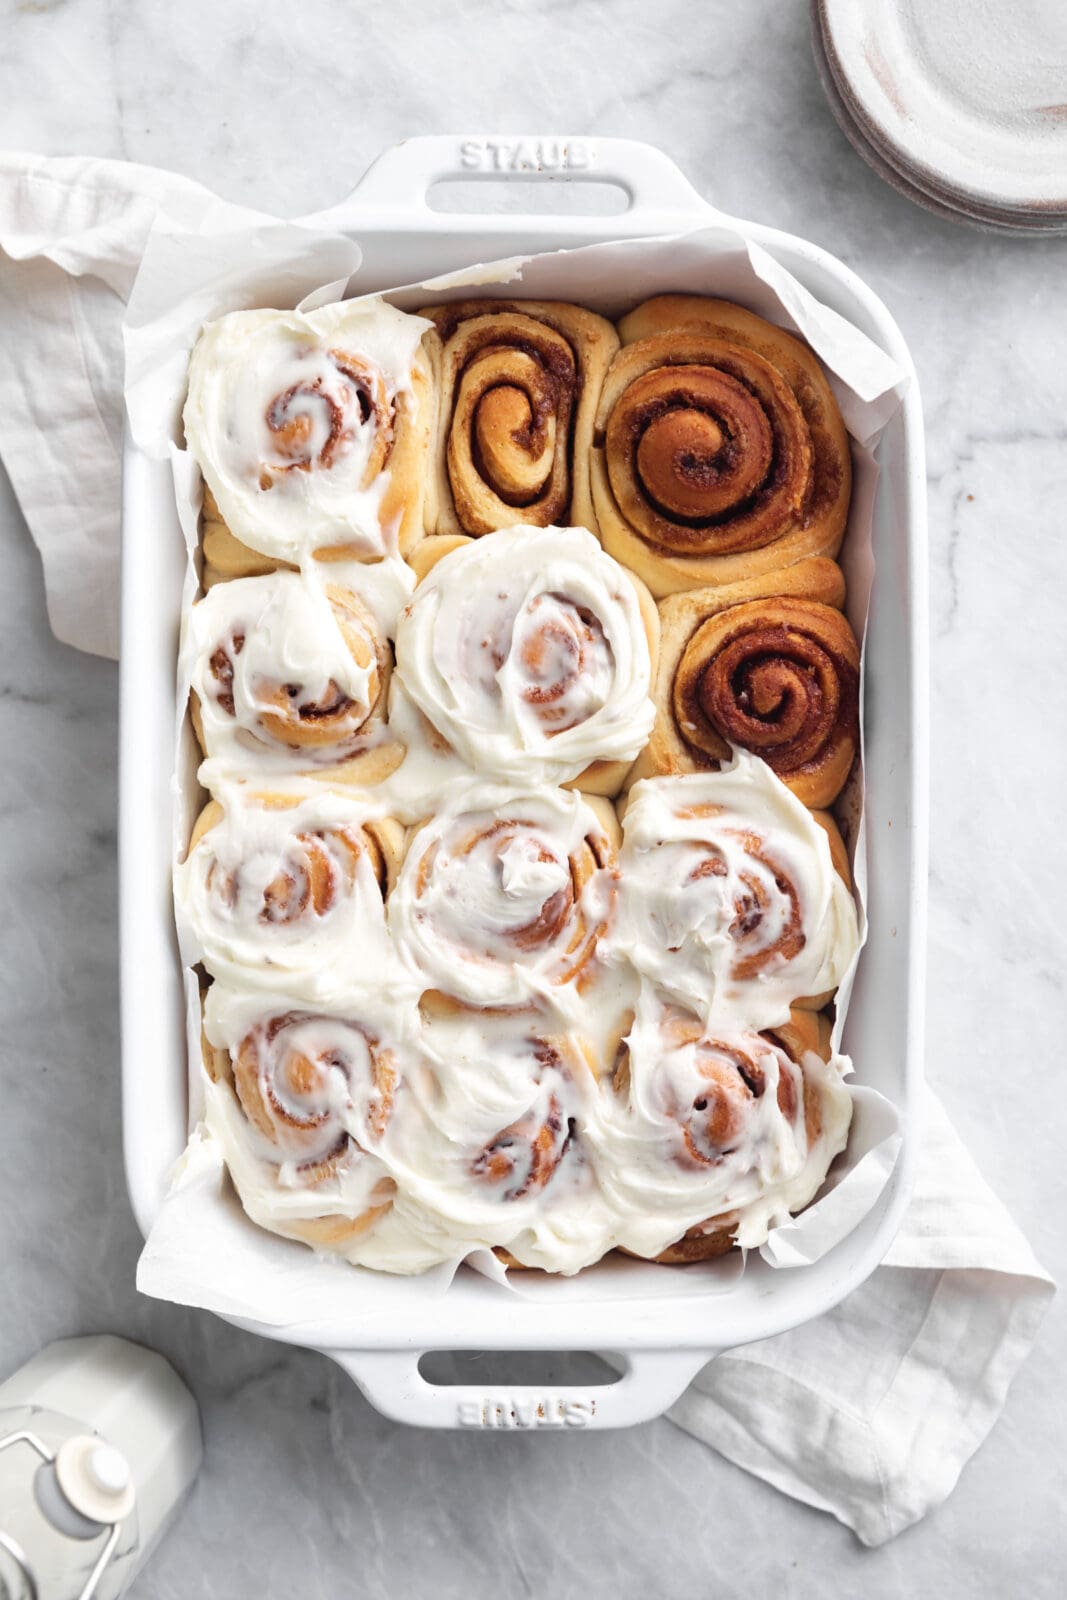
- Preheat the oven to 350°F. Remove the towel or plastic wrap and bake the rolls until they are golden brown all over, about 30 minutes. Place the pan on a wire cooling rack to cool slightly, about 15 minutes.
- While the rolls cool, make the cream cheese frosting. In a stand mixer fitted with the whisk attachment, combine the cream cheese, butter, powdered sugar, 2 tablespoons of the milk, vanilla, and a pinch of salt. Beat on low speed until combined, then gradually increase the speed to medium-high and beat until light and fluffy, about 1 minute. If the frosting is too thick, add another tablespoon of milk and beat to combine. Spread the icing evenly over the slightly warm rolls. Enjoy warm!
Notes
- If you would like to make the cinnamon rolls the day before, you can make the dough as directed through step 11 (cutting out the rolls and placing them in the pan), but instead of letting the rolls have their second rise, cover them and place them in the fridge overnight. In the morning, take the rolls out of the fridge and leave on the counter for an hour to warm up and double in size before baking as directed!
- Prep Time 30 minutes
- Cook Time 30 minutes
- Total Time 1hr
- Yield 12 rolls
- Category breakfast
- Method oven
- Cuisine american
Seriously – perfection!
I made the rolls last night, put them in the fridge and baked them this morning. These are exactly as Broma Bakery describes: full of flavor and pillowy soft. They are amazing. My only go to cinnamon roll from now on.
The process to making these was not hard or time consuming. I love that the rolls can be refrigerated and baked the next morning.
I gave it five stars preemptively because, although it’s been several years since I last made cinnamon rolls, I remember enough to know that this recipe will be perfect. I can’t wait to try them!! Thank you very much for sharing it! 😀
Hi Nancy! Thank you so much for you kind words! That’s so sweet of you! Enjoy them xx
Hello! Okay, so I’m left speechless. My expectations weren’t very high (after all, I am just a bread beginner), but these turned out absolutely stunning!! They were perfectly soft, golden and tasty – exactly how they’re supposed to be. And I’m jut so pleased, I finally found a recipe that is literally perfect, while having the easiest steps! Tysm!! ❤️❤️
Hi Annie! Thank you so much for sharing your high praises! We’re so happy to hear you enjoyed xx